How to Perform an Alternator Test on a Briggs and Stratton Engine
edit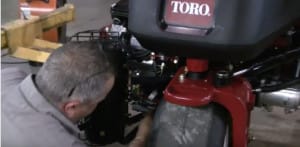 If you’re experiencing problems with the electrical system on your Toro turf equipment, the problem may be a bad alternator or a bad battery. These problems can include:
- Hearing a click or groan when starting the engine
- Battery is not charging or is draining too quickly
- Electronics on the equipment are not functioning properly
You can quickly determine if the alternator and battery are functioning properly by performing simple tests. The following describes two methods for performing an alternator test on a Briggs and Stratton engine. For the battery testing procedure, see our blog post on battery testing.
Note: Be sure to check all safety warnings in your equipment’s operating manual before performing any work on the electrical system or engine. Contact an authorized dealer for assistance if you have any questions.
For a quick-and-dirty alternator check that can be done without any testing equipment, simply start the engine and turn on the headlights on the piece of equipment you are testing. Then, turn off the engine.
If the lights dim, then the alternator is probably working properly. If the lights do not dim, then it probably means that they were actually being powered by the battery even when the engine was running, and thus your alternator is probably not functioning properly.
For a more accurate test, if you have the proper equipment, you can follow the following procedure.
Step 1: Connect a charging system voltage multi-tester to the engine
For a Briggs and Stratton engine look beneath the blower housing above the starter on your engine for the connector that is attached to the stator (yellow wires). Disconnect wires from the voltage regulator for testing purposes. Set the Multi-meter to check for AC voltage coming out of the stator. Reference your Briggs and Stratton service manual for proper AC voltage specifications on your specific machine.
For an AC Volts test, set the tester’s dial to AC volts and connect one end of the black multi-tester lead into the tester’s COM receptacle and the other end to ground. Then connect the red lead on the multi-tester to the tester’s AC Volts receptacle, and the red lead to the appropriate stator output wire.
Step 2: Start the engine
Start the engine of the piece of equipment that you’re testing. Then, use the tachometer to set the engine test speed to Toro specifications (located in the service manual). Perform charging system test as outlined above and verify the AC output is above minimums. If the reading is below the minimum range the stator is bad and must be replaced before further testing can be performed.
Step 3: Turn off the engine
After the test is complete, shut down the engine and disconnect all the equipment.
Following the steps outlined above will tell you definitively whether or not there is a problem with the alternator on your equipment. To determine if there is a problem with your battery or a diode, follow the procedure outlined in our post on battery and diode testing.